TheWoodcrafter.net
The Woodcrafter Page
Copyright © 2004.
My Basic Projects
The Retro Section
Jr. Woodcrafter
My Work (Pics)
Detailed Plans
About
Lathe Work
Safety
Hints
Pic Gallery
Links
Search
Home
Birdhouses
Guest Book
Contact Us

The Woodcrafter Page© 2004 - all rights reserved.
 
Ad space available here.


Using a Wood Lathe


Lesson 10 - Scraping and Boring
 

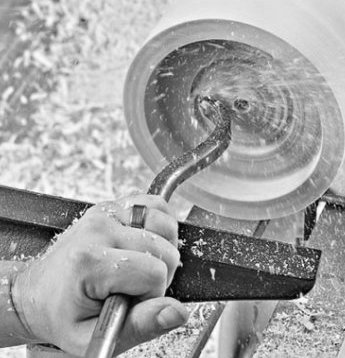
USE OF SCRAPING TOOLS

When scraping is to be employed, it should be done with only those tools that are made for that purpose, i. e., Square Nose, Round Nose, Spear Point, Right and Left Skew. The handling of these tools will be found easy.
The only point to remember is that they should be held flat on the tool rest and parallel to the bed of the lathe when in use.
In general practice the ordinary skew chisel should not be used as a scraping tool, for the cutting edge is not sharpened to withstand the heavy strain required by such work. Should it be necessary, however, to use a skew chisel as a scraper, the tool should be held so that the top grind is parallel to the bed of the lathe while in use.


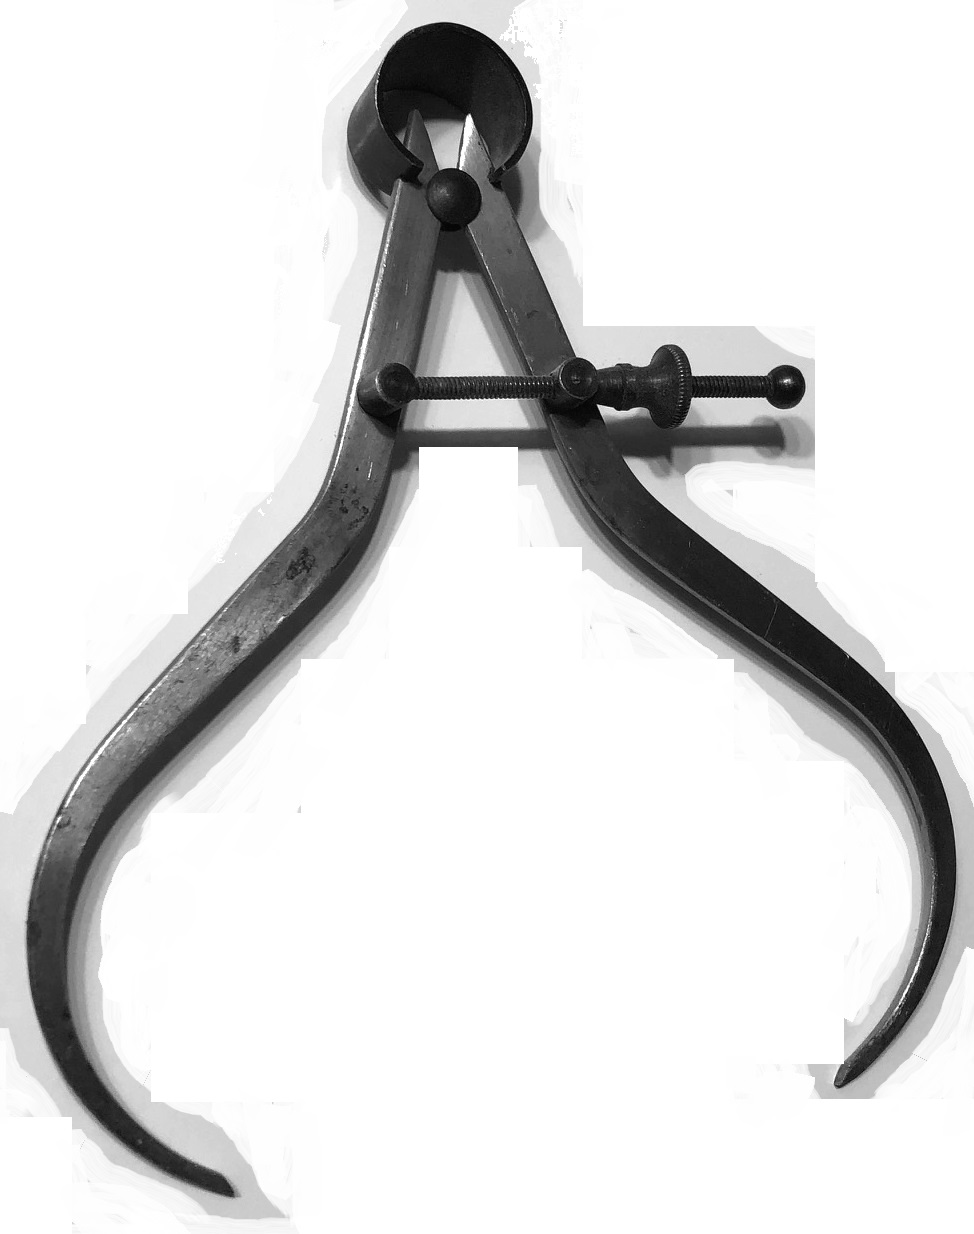
You can use calipers to check the width at any
point on your piece but stop the lathe as the
tool can easily catch and cause damae to
you, the piece, and your equipment.

INTERNAL BORING

In roughing out the center for Napkin Rings, Jewel Boxes, etc., the quickest method is to work it out with a small gouge.
Place the gouge on the rest parallel to the bed of the lathe, having the point even with the center of the stock.
Force the gouge into the wood until a hole is bored to the depth required. If the hole is deeper than 1", remove the tool often and clear out the shavings in order not to burn the point.
In order to enlarge the hole to the proper size the point of the gouge is pressed against the left side of the hole a little above the center and a shearing cut is taken.
To obviate the danger of the tool catching, all cuts should start from the back of the hole and proceed toward the front.


Pic 1

Hollow Form

Internal boring on large pieces, such as vases, is commonly called Hollow Form turning.
This can be a real challenge - especially as the size of the item increases. The force exerted on your tools can quickly become too much for standard tools and you must take the leap and purchase the proper high quality (and more expensive) proper turning tools. These tools have longer and sturdier handles to provide better leverage and better control. (See pic 2.) I have seen tools with handles as long as 4 foot long.
The outside of the piece can be shaped by turing between the tailstock and a faceplate or adjustable headstock jaws. Once the outside of the piece has been shaped make sure the piece is fastened securely to the faceplat/headstock.


Pic 2

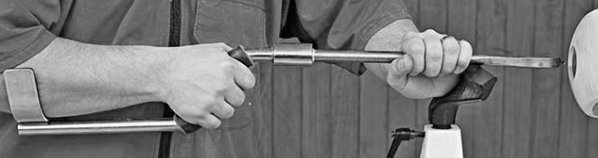
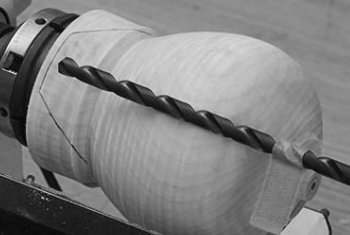
The first step is to bore/drill out a starter hole. This should be ever so slightly smaller than the size you want for the hole in the top of the finished project. You may need to make several holes of varying sizes and building up to the largest diameter. A great way to know how deep you are drilling is to measure the desired depth on your drill bit and place tape indicating where to stop. (See pic 3.)this technique can also be used to see how ddep your tool is cutting while hollowing the piece out, (See pic 4.)


Pic 3
   
Pic 4


Spheres
 

After the sphere is turned as nearly perfect as is possible when working between centers (Steps 1 to 4) it is cut free from the waste stock and is centered in a chuck.
The chuck is made of any soft wood and should be cut in the end grain, which will insure equal pressure on all


Pic


 Lesson 10 - Spheres